 Until next time, Enjoy the hobby.
A glimpse into the adventure of building Gundam.
Dec 10, 2010
PG 00 Raiser Paint Scheme.
So there seem to be a few questions about the intended paint scheme for the oo. As always I will not be painting this Gundam OOTB color scheme. I do like the blue, red, white scheme on this one though and will be using that as a base. That being said just one blue, red, and white will never do that's just not a Ver Tember. I have taken a photo of all the colors I have for the 00, They are in no particular order; Blue, Cobalt Blue, Bright Blue, Metallic Blue Green, Red Madder, Shine Red, Metallic Red, Metal Black, Burnt Iron, White, Off White, White Green. 12 colors all together not including detailing colors and such. I still have a little bit of snap fitting to do. The weapons for the 01 Raiser need to be built, but They don't ever use them in the series ( I believe I noted this earlier) and one more weapon needs built. Scribing is a slow process especially once the first side is done I have to measure every line to ensure symmetry which I feel is vital to the look. I don't intend to do a lot of shading, I like hard lines I think they really add some visual interest. So that would be about the amount of detail I am willing to share or at least the amount of stuff I have planned at this point for the paint scheme. I am still laying out the panel lines and will do some pla-plating even though my skills with that stuff are greatly limited. DC23 I need you do cut some pieces for me and mail them here lol. I hope this excites you about what I am going to do with 12 different colors on one PG Gundam! it should look awesome, but will for sure take me a long time to do with all the masking and such. As always it will be worth all the effort.
 Until next time, Enjoy the hobby.
Until next time, Enjoy the hobby.Dec 6, 2010
PG 00 Raiser WIP 2
Here we are looking at the second half of a massive build! The O Raiser. What a sick Addition this thing is going to be! I have pretty much decided that I am going to have this thing attached at final assembly. It is just too awesome in that form not too. Here is the complete o1 Raiser minus weapons, I have yet to complete that stuff, I haven't seen them in the series though. Not sure I will even use them in the display set up either.


 Here is the 98% complete leg. As you may have noticed by now I am not a huge fan of pla-plate. But I do love scribing. I intend to do a lot of blues reds and whites in this guy and that being the case I need to scribe in a lot of lines to use as breaks. I know some people don't like my harsh lines, and there are times I like to soften the lines, but there are times when a hard line just looks so clean. Not too many drilled holes though I am letting my drills rest this time. The other leg is left in for comparison. I am not sure if I am going to use Miliput yet. If I do I will take a lot of extra photos so I can do a tutorial on it as requested. I have not forgotten. I just haven't done anything with Miliput.


 That is where the PG 00 is at this point. I am hoping the holidays allow me a lot of build time. With traveling if it allows I will be away from my painting supplies so that will be on hold, but that is the nature of things. Hope you like what you see so far.
Dec 2, 2010
GG Infinite!!!! is OPEN!!!!!
Is officially open! http://gginfinite.com/home.php Gundam Guys store of which I have been shopping via email now for a few months is up and running. It is a great looking web store I must say!!! Gundam Guy is a trusted source for all things Gunpla if you are in need contact this guy and if it can be found he can get it!
Nov 30, 2010
PG 00 Raiser WIP 1
It would seem I am letting some people down by not posting enough... so here it is. The beginning of the PERFECT GRADE GN0000 other wise known as the 00 Raiser. This thing is awesome to say the least. One of the most complicated and daunting builds I have taken on so far. The amount of parts alone is just insane! I believe 971 was what I read some where, sorry I am far to lazy to count. This guy comes as two models the 00 Gundam and the 0 Raiser. The 00 Gundam is completely snap fitted at this point and as you can see in the pictures below he is impressive! I have started the scribing process, and for those of you that have seen any of my other builds you will know that this if a slow process as I tend to go in depth with panel lines and other details. This guy is no different. I am still building the 0 Raiser, but I always enjoy taking a break from one step to do another for a few days.

 Just showing you that it literally took 35 pages of directions for me to complete the build on this guy; not to shabby.
 Decals, for a far far future use, but needless to say I will not be doing a full custom job this time. Not to worry though I have no doubt I will stray from the directions as this is my normal tendency. With out further delay.....!!!!!!! 00 GUNDAM!~!~!~!~!~!~!~!~!~!~!~!
 Below you see the leg frame, I didn't take any photos of the frame yet, I really wanted to see this guy finished! The frame is great though very sturdy. The arms were the hardest part of the build by far, the little spring gears that are used to control the movement really add some challenge in there.


 Heck yeah Exia and 00 Drives working in synch, this by the way is hands down the best Gundam series I have seen to date, I just finished the first season and am now watching season 2. Once I have one leg complete I will post comparison photos for you to see. Same goes with the completed 0 Raiser once it is snap fitted. Things should be calming down a little bit now so maybe I will be able to concentrate on the important things in life. GUNDAM!
Nov 22, 2010
The O Ver Kamm!
Ok Last one, after finishing my The O build and a fellow builder mentioning he was going the path of rivets I could not resist posting this beauty up!
How different The O Ver Kamm is from The O Ver Tem! I like the white color scheme and the fact its hand painted is just awesome. Keep up the great work Kamm!


 I don't know of a blog for Kamm this is posted at M.A.C. (Mech Arts Community) http://s3.zetaboards.com/MACforums/topic/7435799/1
How different The O Ver Kamm is from The O Ver Tem! I like the white color scheme and the fact its hand painted is just awesome. Keep up the great work Kamm!


 I don't know of a blog for Kamm this is posted at M.A.C. (Mech Arts Community) http://s3.zetaboards.com/MACforums/topic/7435799/1
Wow!! PG RX-178 Gundam
I don't normally post other people's Gundam builds, but I don't think its a bad idea when they are worthy. In the case of this one it is clearly worthy of a posting!
DC23 is one of the most skilled builders I know and some one I look to for ideas and guidance. This PG build motivated me in my current PG 00 Raiser build.
DC23 is one of the most skilled builders I know and some one I look to for ideas and guidance. This PG build motivated me in my current PG 00 Raiser build.
Well with out further delay I give you the PG RX-178 Gundam Ver DC23! It is awesome! Here is the link to DC23's blog.
http://dc23-mecharts.blogspot.com/2010/11/pg-rx-178-gundam-mark-ii-ver-dc23.html?utm_source=feedburner&utm_medium=feed&utm_campaign=Feed%3A+Dc23MechArts+%28DC23+mech+arts%29
Nov 16, 2010
THE O VER TEM DONE!!!
This is it! The O Ver Tem is finally done! No this time I promise there are no more WIPs no more additions or oh by the ways on my parts. I am done! :) This has truly been a labor of love; I have poured almost 3 months into building just this gundam, and found skills that I had no idea I had. I now owe a tutorial on miliput which I am still learning a lot about, not sure how that happened :P. I will get that up soon I promise.
I just completed the decals using decals from Gundam Guy! Thank you again my friend. Custom decals always take a lot more time as I just end up staring at the sheet thinking about what to do next and where this one should go. I like the way it came out though. A lot of great detail is added by the smallest thing; even in the places you guys don't know about. I tried to take some pictures of the areas that you normally don't see so you can see the extra care I took to add detail there. I know you think you have seen The O Ver Tem before, but I actually posed him this time and used a backdrop so in my opinion its worth the look.
Please C/C also welcome.


 Well there you have it The O Ver Tem in all its glory, hope you enjoyed it. Until next time. What is next, well the PG Raiser 00 The legs and waist are done so 45% of the snap fit is complete. Have fun.
Nov 15, 2010
Zaku Minelayer,
Well as I work on a The O a friend is leaving the island and has been following my builds closely. I thought his son might enjoy one of my Gundam for himself so I gifted one to him. My Zaku Minelayer. As such I thought it fitting to take some more photos as I only had 3 and post about this guy since I had not done so. I built this Gunpla well before I was a blogger and so there are no WIP photos or anything of the sort, but I felt this guy as one of my personal favorites, and as one of the VERY few that I have followed intended color schemes on it was deserving of a posting. With out further delay I give you Zaku Minelayer Ver. Tember.

 Battle damage decals the only way to cheat. :)

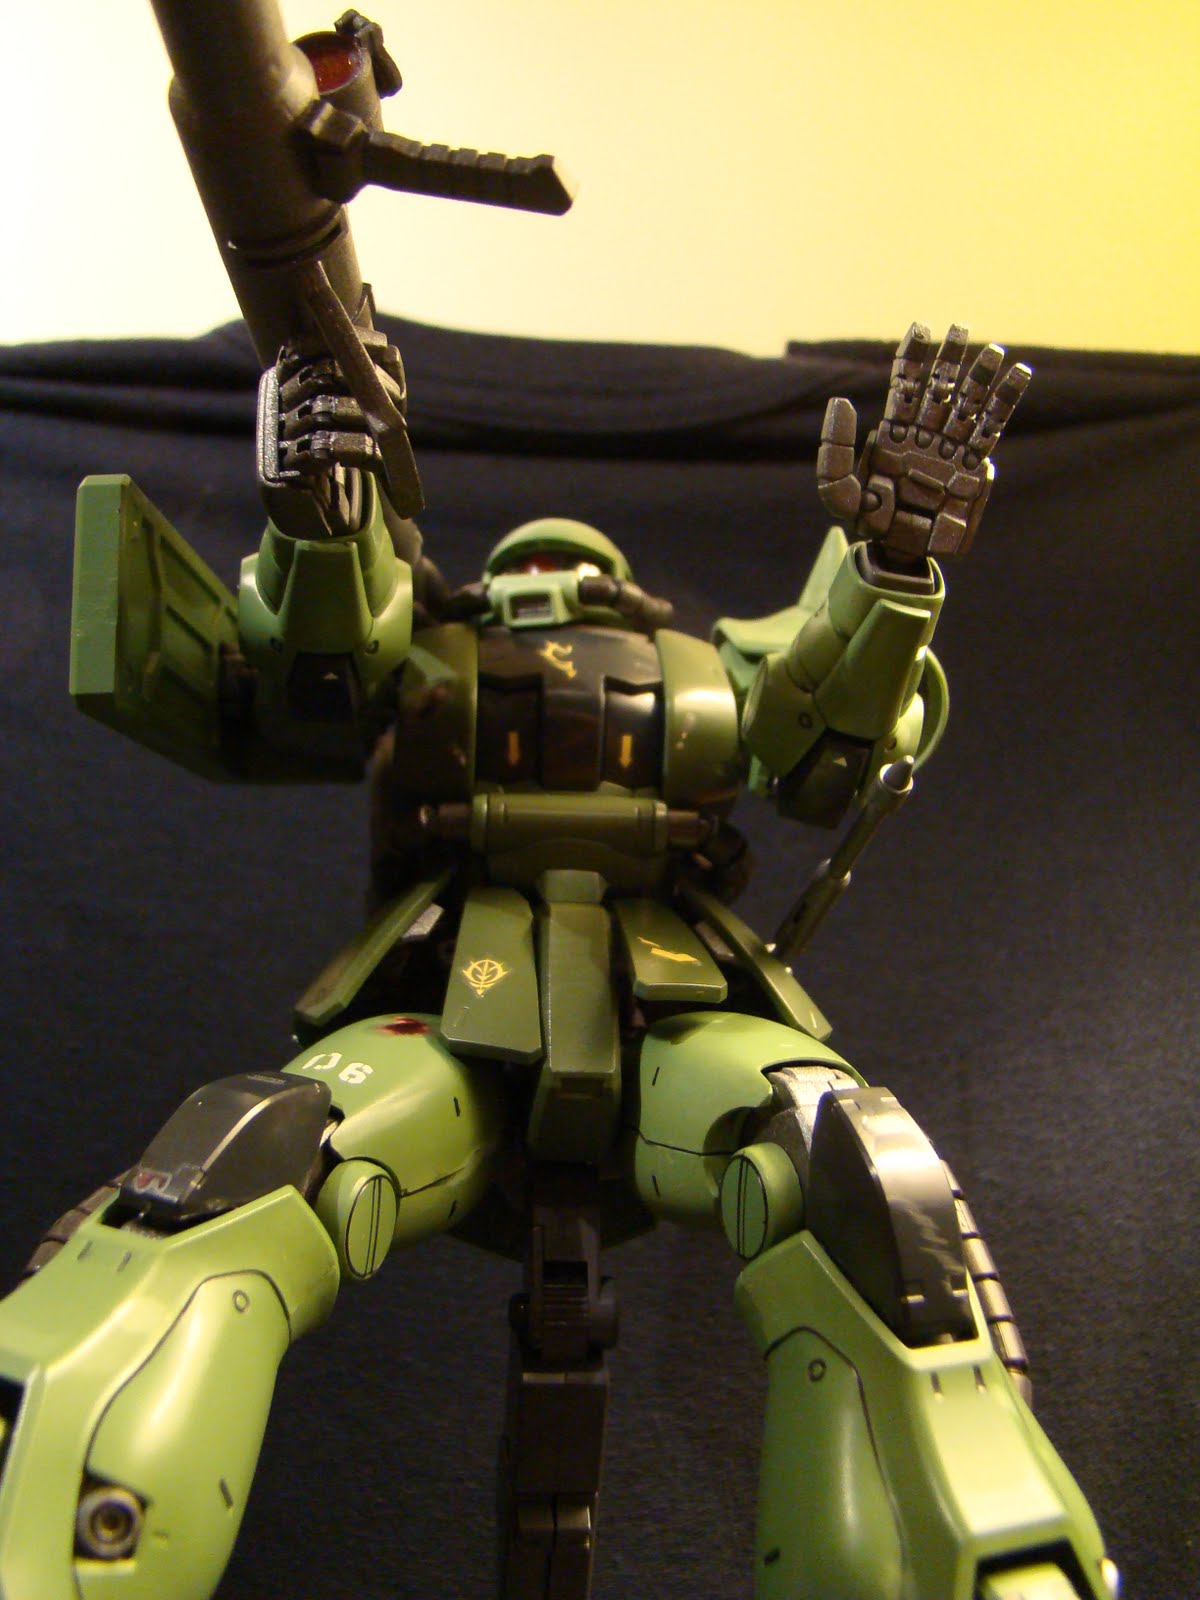

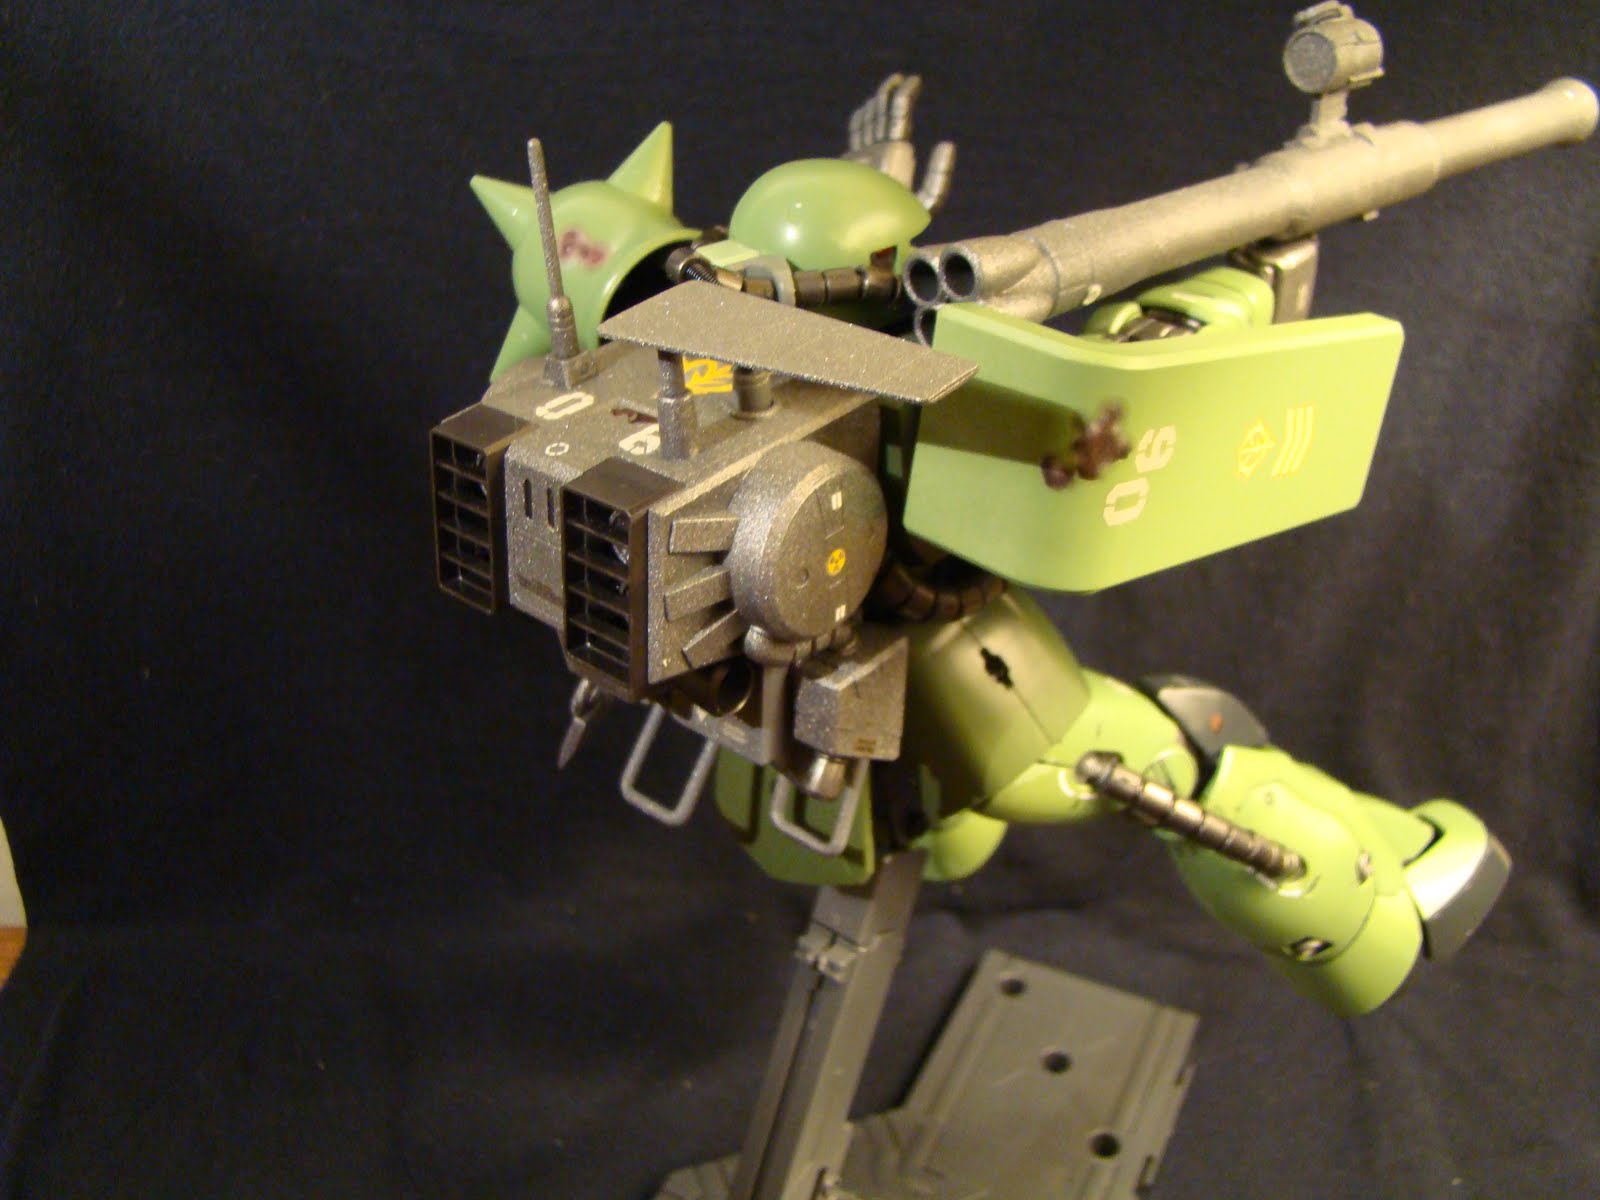


 Well there you have it Zaku Minelayer Ver Tember. I hope you enjoyed it. This guy is still one of my favorites. The details on him are just outstanding. Even with out scribing and all the other things that I do now.
Subscribe to:
Posts (Atom)