Jul 22, 2013

Dual WIP continues!!!! G Gundam and Kshatriya

As my time in San Diego continues I am working on two kits at once. Its fun and provides a nice break while I plan out the customization for each kit as I am really working on getting things done. I start with the G-Gundam. I added plating to the rear wings. Adding depth to the flat parts. 
On the waist I have added a little bit of detail to them. I have to say the hardest thing for me to do is get the plate cut exactly the same every time. I am really working on this though. The errors are minimal compared to other kits I have done.
Same goes for the center piece of the chest. As I make final decisions on the paint scheme I am adding details to make that really pop.

That is where I am at on the G-Gundam. You will see why I have only got this far. Its all due to some serious set backs while trying to customize the psycho frame kshatriya. The first attempt was this one. My thoughts were to attempt and line up the upper piece with the lower one. I added extra plating for the higher sections of the upper piece.

I reinforced the plate in the back so that it would be more rigid. 
But it was not to be. I spent about 2-3 hours working on this and getting it all lined up. When I put the top part on no matter what I did I could not get it to line and and look clean. So I walked away for a. I came up with this solution in my sleep...weird I know there are times when I dream of the solutions to Gundam build issues. (and yes I know the Kshatriya is not a Gundam) Mobile suit issues. 
This is the fix that I came up with. I pushed the plate up from the bottom and Pro-welded it in place. The only challenge here was to get the posts back through with out cutting too much out. 
After all the glue was dry, I added a lot of plate and other detail up parts to get the details I wanted for the psycho frame. I am not looking for a super smooth build, but when do I normally build a smooth kit? Not too often. 
And here is what the completed set up looks like. If I had the want to do LEDs it would look amazing, but I don't for this kit. Being an HG kit I am going to cut out a lot of sections to add the psycho frame look. 
So far I have one completed a second one with the smooth plating done. hoping to get some more done soon, but I am pretty focused on the G-Gundam right now. Its got a flow going and I am not looking to stop it. I am hoping to be able to get the paint and have it done soon after I get home. 
As always thank you for stopping by. T.G. 

Jul 12, 2013

Dual Posting time! G-Gundam WIP 2 and HG Kshatriya WIP 1

Hotel room bound again. No paining this time though. Just two projects of fun. First things first, my G-Gundam build. I have been given free license by my cousin (person I am making this for) to do as I see fit. At first I was going to keep it pretty plain....and then well you know things happened Pla-plate starts flying and next thing I know this is becoming an original build for sure.

The first of 2 legs has been completed. The photos are comparison.


I didn't go too crazy, but I did add some needed details to the leg armor. I have never been a huge fan of big smooth armored places on some of the Gundam I build. Below is the chest, I have a few more details that will need to be done on it, but for the most part its completed. The back is plain as I need to be able to get a good fit for the core fighter.


Its mainly adding details and some scribing. Not a lot of scribing though. I just don't see this one and all paneled up for some reason.

Onto what I have done today! I am normally not a man to build HG's I don't like the amount of work they represent to make them look good and I don't like the small size of the true 1/144 ones...This one is 1/144 of course, but in that its still as large as a 1/100 MG. After snap fitting it and looking into where I wanted to add detail I had the thought as I am hoping to get the shipping notice on my Elynn Hobby Kshatriya that I wanted to do something original. I have seen a lot of builds where the center section is split so you can see the detail inside, but I have not seen one that is cut apart and details are exposed close to the surface. So enters my days efforts thus far. Below is the stock look.
This is post cutting:
And cut out removed...so much clean up.
Cleaned up inner frame put back in as you can almost see there is no detailing inside. 
So to get the gap I want I added some 3mm posts glued them in place after measuring 3-4 times to ensure equal height.
And now I have the gap that I wanted. Nothing huge, but a good place to add detail. The plan as it stands is to back it with pla-plate and then build it up with koto parts and such to get all the mechanical details I feel it needs.

Its going to be a fun project, slow but fun. Only 3 more to cut and build....what have I gotten myself into!?! As always thank you for stopping by. T.G.

Jul 6, 2013

Mecha Lounge CHAOS Group Build Peoples choice winner voting!!!!

We need your votes at Mecha Lounge! The peoples choice award winner is in its voting phase now and needs your vote! Please use the link below and vote for the builder you think is the best. A vote for me would be appreciated, but a vote none the less would be great too! 


Thanks T.G. 

Jul 3, 2013

MG G-Gundam! WIP 1

The next project(s) has begun!!!!!

I have started modifications on the G-Gundam build for my Cousin, and dragged out of waiting my HG Kshatryia. I love the KSH, but the HG leaves something to be done, but I am feeling up for the challenge. The G-Gundam as is usual for my builds for others the colors have been chosen, but I get to choose placement, Black, Grey, and Purple are my starting point. I have a feeling I will add another color, and maybe do a bright frame to give it a little pop from the black and grey.

As you can see the snap fit is done and this guy is nothing but rounded edges and night mare connections. I guess thats how it gets it mobility. But it is not all that friendly to scribe. I am going with the orange hands as a primary posing, but if I can figure out a way to paint the rubber parts I will do some of them as well. Rubber hands.....not my favorite.


My first fix so far was to make these boring boosters better boosters. Easy enough really. 
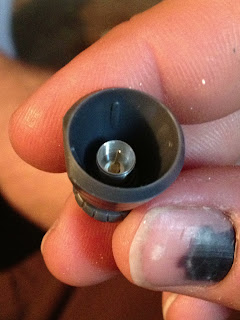
Bam, there you have it a pin and a metal booster inner and things are much better.


I also decided that this guys weak little stock boosters just wouldnt work for me! If you look at the picture from the bottom up...where you see the rings the boosters below it are the stock ones, the boosters above it are koto parts. Better a very tight fit though.
Nothing a little sanding cant make better.
Now to fix the rest of the back pack. Its supposed to be a core booster, but when have I ever cared about supposed to be things. Added a pin for placement.
And now you have 3 boosters....this will be the turbo version of the G-Gundam
And started to plate it up.
Its a start nothing amazing yet, but hey its a WIP. Thank you for stopping by. T.G.