Well as you can see I have uploaded a lot of photos. I have been working hard on drilling holes. It is unbelievably time consuming. 3mm spacing and a rigid ruler, but the end look in my opinion really does have a look of an old tank, or piece of armor.


There have only been about 3-4 times where I have gone through. I haven't decided if it is going to affect the look enough for me to back it and fill it or not though.

Below you will see the "improvements" I have made to The O, making it truly a
Ver.
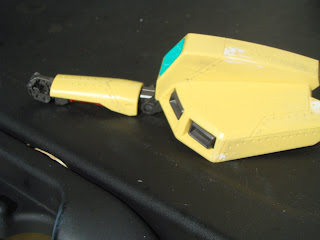
Tem. I am not giving everything away just yet, but needless to say on the backpack I am adding 2 large beam guns, this is the piece that will hold them. I had a Freedom
Gundam that I messed the paint up on when I first started, I just couldn't bring myself to throw the kit away; luckily that worked out nicely; I will have to remove the paint before I start working on it, but
that's all right.


When you add weapons, you need to find a way to power them, I added this to the huge!!! butt plate, and will take some wire and brass springs to make it look like a power supply. I have also done some seam line removal on it, but that is not reflected in the picture.

And as you can see this guy can now fire from the hip! I just can't see the biggest MG I have seen so far with one gun and some beam swords. He should be a long and close range threat. Hope you enjoy the pictures. there are about 6-8 more pieces to drill before I can begin the paint work on this guy. So close...


 There have only been about 3-4 times where I have gone through. I haven't decided if it is going to affect the look enough for me to back it and fill it or not though.
 Below you will see the "improvements" I have made to The O, making it truly a Ver. Tem. I am not giving everything away just yet, but needless to say on the backpack I am adding 2 large beam guns, this is the piece that will hold them. I had a Freedom Gundam that I messed the paint up on when I first started, I just couldn't bring myself to throw the kit away; luckily that worked out nicely; I will have to remove the paint before I start working on it, but that's all right.

 When you add weapons, you need to find a way to power them, I added this to the huge!!! butt plate, and will take some wire and brass springs to make it look like a power supply. I have also done some seam line removal on it, but that is not reflected in the picture.
 And as you can see this guy can now fire from the hip! I just can't see the biggest MG I have seen so far with one gun and some beam swords. He should be a long and close range threat. Hope you enjoy the pictures. there are about 6-8 more pieces to drill before I can begin the paint work on this guy. So close...
Hot Dang dude!!! All those holes must be taking forever. I fear I no longer have this type of patience. You the man.
ReplyDeleteIs turning out good. The holes on the platings really make the O feels like an actual mecha. I like the location where you have decide to place those Freedom cannons. Just a small bit of advice for that, perhaps adding some pla-plates to it to make it look different, so people can't recognize that it is from the freedom's kit.
You are getting closer to the finish line. I better get started on my kit too.