Sep 20, 2012

MSA-001[BST] Gundam WIP 6

As I set off to drive back home; I took a few pictures, as I am not able to contain how cool this thing looks with all the booster packs attached! I know the actual boosters arent on there yet, but they dont stay on with out a ton of sticky tack, and I am far too lazy for that at this moment. (: The gun and everything set nice and tight too. I may need to reinforce the base due to the overall weight of this kit, but thats an issue for when I am at home and have all my tools again. You can see on the left side (for you) right side of the Gundam the wing, the left one wouldn't stay on and I already had to glue and sand one down after it snapped in shipping.

The white circles in the upper boosters are .040" plastic I didn't like how low in the extra fuel pods sat so I used that to raise them up some.
The wires and other little details added to the underside add a nice little something.

As you can see by the upper right booster, globs of putty I still have clean up to do. The putty I am using is harder than the Tamiya kind, but it takes considerably longer to dry. Normally needs 12+ hours for a good hard cure.

And with this happy guy staring you down, I bid you a wonderful weekend. Mine will be spent in a car.
As always, thank you for stopping by T.G.

Sep 19, 2012

MSA-0011[BST] Gundam WIP 5

This will be one of the last updates for a little while, as I drive back across the country again...so boring.

Any ways; I have completed detailing the lower two boosters, and one of the upper boosters, I did them a little differently to add to the detail and eye appeal of this beast. I even managed to hang the fuel tanks and boosters for a picture...the arm will obviously not hang that low, but I didn't want to touch this thing as its not very well balanced and things aren't glued in place.


You can see how the gun is going to sit on an angle in towards the body. At this point I have done all I can to get it to sit upright. The way the armor and the small clearance between the body and the arm make it a huge challenge for sure. I will take a closer picture later when I am done adding all the reinforcing rods, but the gun makes this arm very unstable and heavy. I had to use a really long pin in the hand, and add a pin to the back of the forearm to secure the weight and position of the gun. 
Here's a glimpse at what it will look like with both boosters attached. 
and the final alignment of the upper boosters. 
This is a picture of the now dry primer....I am not happy at all with this brand, so I searched out and found a case of the Krylon primer, but I have to sand all of this before I can use it. 
Now for some details on the upper boosters.


I didn't go insane on the details, at least in my opinion. But I did make it so those fuel stacks or what ever they are have some cabling to add something other than blank weakly detailed areas. 

Until the next update: thank you for stopping by T.G. 

Sep 15, 2012

Upcoming kits, and WIP 4

I will start this post with a look into my future builds. The first one is something I have been waiting a long! time for. Thehelmosengine's Drehksturm! My kit is being poured as I type and I am beyond excited. As I said I have been waiting patiently for this kit to be completed. I only hope I can do justice to what will end up being the second Drehksturm ever built! The pictures below are from the first one completed by Decay. Needless to say I seriously doubt I will go with anything close to this paint scheme.

This is where I am in the prep. The kit uses the MG Zeta 2.0 frame as a base. So I am taking my old Zeta build and purple powering the old paint off so I can clean the pieces and prep them for the resin parts. 

The other kit in my future from Thehelmosengine is this guy... the Lanzegeist. The video will do way better giving you all the information if you are interested in joining me in building this awesome fully transformable resin kit.


_________________________________________________________________________________

Now WIP 4:

In current works, I have been working hard on the MSA-0011 [BST] Gundam. I have all the pieces done with initial glueing and ready for scribing and priming.


 here you can see how I lined up the pal-plates so I could fill the gaps on the shoulder pieces. After they are glued in place and it has cured; I take an exacto knife and shape it then a little sanding it all is done. Gap covered.

 Here it is with the gap covered.
 My other challenge has been lining up the gun on the arm and having it fit under the body and shoulder. So I ended up taking a really long pin and using that, but it stuck out so I took multiple pieces of plate and used Proweld on them. After letting it dry overnight the proweld took what you see below and basically chemically melted it all together so it was as simple as shaping the plastic to the wrist was longer.

 Just a quick shot of my hotel priming office.....it is so humid here that 7 hours later the primer is still tacky, and I will now officially say I am not a fan of rustoleum primers for plastic and resin. They come out too thick for this work. I am going to end up spending hours cleaning up thick primer spots.
 The scribing was also started today. Nothing amazing or new, just a quick few shots.

 And more details were added for this apparatus lots of little tubing and plate to make it look better.

 Just some true WIP photos while I was bending the plastic tube.


 And the after photos.


 Much better, now it looks like something that belongs. I am not sure why, but it was supposed to have some connector that didn't connect to anything so I thought I would just make it better. In my opinion I did.

A busy update I know, but an important one.
As always thank you for stopping by. T.G.

Sep 12, 2012

MSA-0011 [BST] Gundam WIP3

Where to start with what is becoming one of my favorite builds so far. And one of my most challenging as well. I suppose a little preview of the size of this thing. I used my arm for you first; you can see the gun and the fuel tank in this picture. To give you a literal measurement I took a picture with a 6"/15cm ruler. Needless to say when this build is done this Gundam will cover almost 2 feet from tail to tip of the gun.


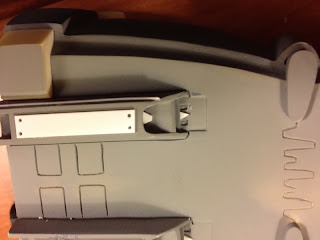
One of the challenges I have had to face has been filling gaps in that if I just laid putty down I would have to wait a week for it all to dry completely. So I have been using Pla-plate and layering that. Here you can see my work to fill the lower chest sections. I could just sand it, but if I sand too much I will have to fix the fit of a ton of other pieces and it would make everything disproportionate.
A side view to show you the pre-clean up difference in height.
And now for fun a quick kind of "snap together" viewing.
The head is super aggressive on this guy. Even setting straight up it looks super well aggressive.
I don't know if I took a lot of pictures of the pre-clean up section of the upper chest. I took what was very smooth and well boring, and upgraded it. A lot more little details to increase visual interest.

Here is a view of the back, most of this will never be seen as the fuel tanks and back pack will cover all this up.
This photo is of the back with the fuel tank and booster packs attached.
The booster on the right is not completed in this picture.
This is what it looks like from the front.
And the lower boosters, the boosters are too heavy for me to get them to stay in place with out me holding them right now.

And this weeks accomplishment...completion of how I am going to put this guy on a base...I skipped a lot of the scratch building I am horrible at in favor of a skill I am good at...cutting and pasting. I modified a standard bases mount to meet the needs of this kit. Here you can see the after affects of clean up and pal-plating.
A fit test. I am using 5 1.8mm rods to hold this thing tightly.
And here you can see the pins partially inserted.
Its a clean look and well hidden with the boosters attached.
Fuel tanks....thats a lot of gas.
And the lower boosters with out the actual boosters attached they fall off a lot. and I normally don't leave them on so I am going to continue that trend of laziness.
Thats what I have so far.
As always thanks for stopping by. T.G.